

Smoothing Plane Shootout No. 4 in D flat Minor
I am a hybrid woodworker I suppose, I guess I am really a “get stuff done” woodworker. The electric planer is a thing of beauty for milling up gnarly grain and rough sawn stock. For fine tuning fits, getting smooth finish ready surfaces, and just general enjoyment you are bringing a hammer to brain surgery. There is nothing more rewarding in the shop than taking a good shaving with a hand plane, it is one of those man meets fire moments the first time you do it.
I have quite a stable of craigslist and ebay finds in my plane tote an old Sandusky tool wood body plane (18”s or so and my personal favorite) a stanley #5, a modern stanley #4 converted into a scrub plane (highly recommended), and a lowly Harbor Freight #4 I have tuned the pants off of (work in progress.)
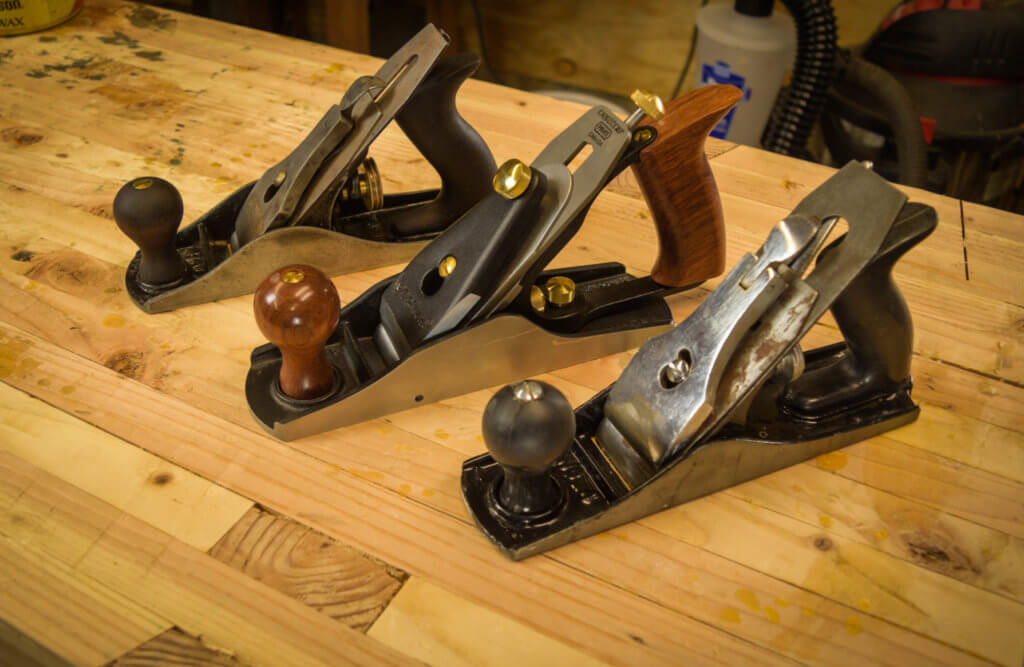
The competitors lined up for battle.
I have been able to get decent results with the HF #4 but you’re number 4 should be the best plane in your arsenal for shaving off half a micron to get that finish ready surface, it was time for an upgrade. I got my hands on a Veritas #4 (Thank you Lee Valley Tools) and a vintage Stanley Bailey (USA made) no. 4 corrugated plane. Why not take this opportunity for a little shootout and learn a little about these planes? I am going to try and look at these planes a little differently, more as a tradesman than as a hobbyist woodworker. Not just how much they cost up front and the end result and features, but how long do they take to get those results and how reliable and repeatable are those results?
So let’s say an hour of prep time is an hour of downtime and we will monetize that conservatively at $15 an hour. So if a $20 plane takes 5 hours to set up it is now a $95 tool. With that in mind, lets take a look. We will start from the bottom and move our way to the top.
Harbor Freight Central Forge no. 4

A blatant knock off of the Stanley bedrock design for $15, but is it worth it?
This was one of the first planes I ever bought, after watching YouTube woodworkers obtain amazing results with wonderful old Stanley planes, I wanted in on that action. I used to go to Harbor Freight the way that folk go to Ikea. I would look through the various ware amazed at what you could get for the money and pick up a little trinket here or there. One day I was walking through and I saw a little kit for $14.99, with a 25% coupon the kit is a little over $11. When I brought it home and first started to used it it was a disaster. It was tearing out grain and leaving tracks everywhere it went, every 4 of 5 strokes the chip breaker would clog, and the sole was nowhere near flat, it was impossible to get a full length shaving. I am sure all of this is just to be expected with the QC on a chinese made $15 tool, so you might get a better one, or might get a worse one (god forbid.)
The first step,
was the chip breaker, it did nothing like mate to the blade and it was very thin steel. Through several rounds of honing and hammering I was able to get the chip breaker to mate well enough with the blade, but every couple times I pull it out I find it comes out of alignment.
The second step,
was to flatten the sole. From the factory mine had two flattish spots on the outside edges of the sole, so it referenced fine, but the thinnest shaving I could take would chip out anything harder than construction lumber. Since the steel was so out of flat, yet was still fairly hard, it took hours over several sessions to get the sole truly flat. It was hard going so I could only handle maybe an hour at a time, but overall it took between 3-4 hours to flatten.
The third step,
was the blade. The steel that came with this plane was seemingly softer than brass, it could be easily dulled or even dented by a knot, even in something as soft as walnut. I went to the Warehouse of Stuff here in St. Louis, which is like a giant industrial/residential garage sale. While there I picked up a bunch of old plane parts and frogs, and a bunch of other junk to clutter up my shop. Part of my take was a spare Stanley blade, I replaced the factory blade in the HF plane with the upgraded plane after it had been sharpened. This blade now holds an edge much better..
The final step,
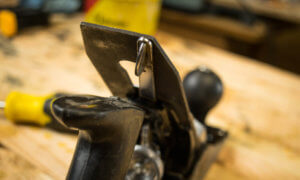
and really fatal flaw of this plane is the lateral adjustment mechanism. The plane is manufactured so far out of flat, square, plum really any sort of precision the adjustment mechanism needs to be cocked all the way to one side or the other to get the blade parallel with the sole. The fatal flaw is that the lateral mechanism is attached with a rivet and has no adjustment mechanism to make it stick after it is set. The only solution to this, since the blade came come out of square at any time and gouge your work, was to add a crazy camber on the edges of the blade which effectively reduced the width of the blade by almost an eighth of an inch so it performs more like a no. 2 than a no. 4 (no buneo.)
At the end of the day, I have been able to get good results from this plane immediately after re-calibrating it but it is a continuous work in progress making it very inefficient and an almost useless tool for anything beyond making decorative shavings. It would be a great gift for a kid you are looking to get into hand tool woodworking, to teach them how to tune a plane, since they have to to do it every 3rd day.
I will stop the clock at 20 hours on this one, at $15 an hour that makes the real cost of this $15 plane, $315.
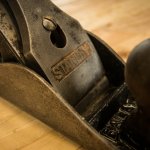
Classic Stanley Bailey no. 4 w/ corrugated sole
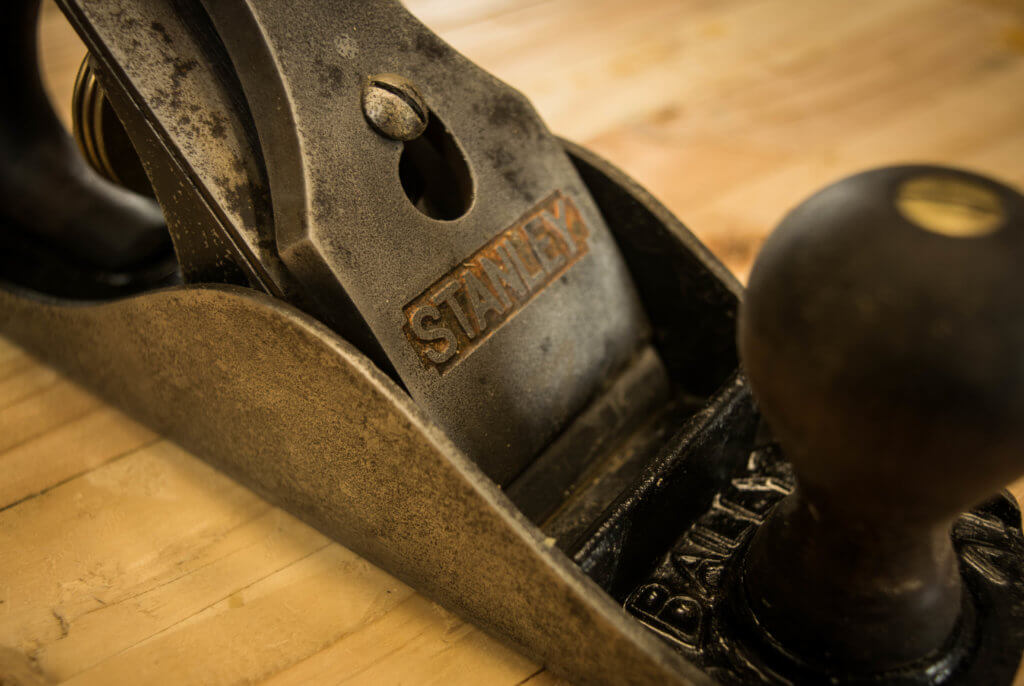
A little love and wear and tear go a long way into accentuating the Stanley No. 4’s classic good looks.
I have long wanted to purchase and restore a Stanley Bailey plane. I have a modern single blade no. 4 and a classic no. 5 workman which I do like, but a classic Stanley Bailey plane is a must have tool in any collection. Like any used item, when you are actually ready to buy one, they will be nowhere to be found. I exhausted Craigslist and local garage sales and without driving 4 hours round trip I was out of luck. I wasn’t willing to add four hours of drive time to the purchase as that would throw the downtime way out of whack.
I went to Ebay and snooped around,
Here are a couple of thing to look for when looking for a good plane…
-
Look for cracks in the handles (unless you feel like turning one or cutting one out) the rear tote tends to crack on these old Stanleys if the grain wasn’t oriented correctly from the factory.
-
Look for chips or major damage to the sole.
-
Look to make sure that all of the parts are accounted for in all the pictures.
Pitting in the visible part of the blade is no big deal, but pitting in the sole should probably be avoided. Paint speckles are also no big deal.
-
I like the corrugated planes because they are easier to flatten, but this is a personal preference, a flat sole just has a little more material to be removed.
-
I prefer the bedrock style planes with the adjustable frog, this makes for a lot of flexibility.
-
If you have big hands, you will probably want to look for a no. 4 ½ (I did not) the number four has a very narrow tote.
-
If you are on Ebay a plane that has an under priced “buy it now” option, you may be able to win one for $20 on an auction that ends at midnight Christmas day, but most of the time a halfway decent no. 4 of good vintage goes for $60+.
Here is the plane I bought.
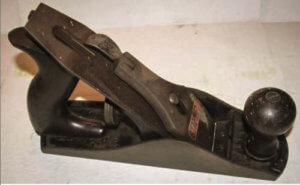
This American Stanley Bailey was in need of a lot of love. It’s glory days had passed it, but it had a chance yet.
Restoring these planes is a project in itself. I always start off by dropping all the parts into a bucket of vinegar to start to breakdown the rust (I have tried more aggressive and purposefully formulated de-rusting agents but they seem more caustic than helpful) and leave them there overnight. The next day I go after the rust with all manner of tools, steel wool, brillo pads, brass brushes, sand paper, hard bristle brush whatever you have around. After the rust is gone it is up to you, the only really necessary steps are to flatten the sole and the frog to whatever degree is necessary, and to sharpen the blade.
In this case I went all out, and all in all, it took me 6.5 hours to get to look almost like new, with a little vintage love left over.
At $38 shipped and 6.5 hours in restoration at $15 an hour, the effective cost of the Stanley was $135.50.

Buying a used plane can be like a scavenger hunt to find out what year you got and if it is a collectible of any value.
The Veritas #4 Smoothing Plane
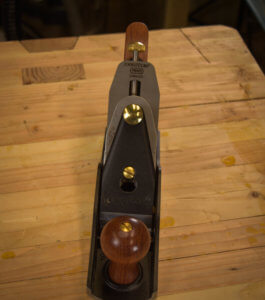
The bubinga handles, PM-V11 blade and meticulously engineered Vertias no. 4 is a marvel.
Sold through Lee Valley tools, the Veritas #4 smoothing plane comes out of the box basically ready to go. With the PM-V11 (The PM-V11 is totally worth it, stays sharp for a long time) Iron, the Veritas #4 is $232+shipping and handling. For that price, everything comes out the box with QC stamps that everything is tuned to the Nth degree It also has a unique Norris style adjustment mechanism which has much more positive feedback than the Stanley design. The screw adjustment has no slack and the tension is adjustable with the screw adjustment on the cap iron rather than Stanley’s flip tensioner. The sole also has an adjustable mouth similar to the Stanley no. 9 ½. Some people see this as a problem, I personally appreciate the ability to tune throat opening without leaving the edge of the blade unsupported. A tight throat is integral to getting those wispy translucent shavings (which I guess the merit of can also be argued.) There are also micro adjust screws in the sides of the plane body to keep your blade square. All of these fine adjustment mechanisms make repeatable results a breeze.
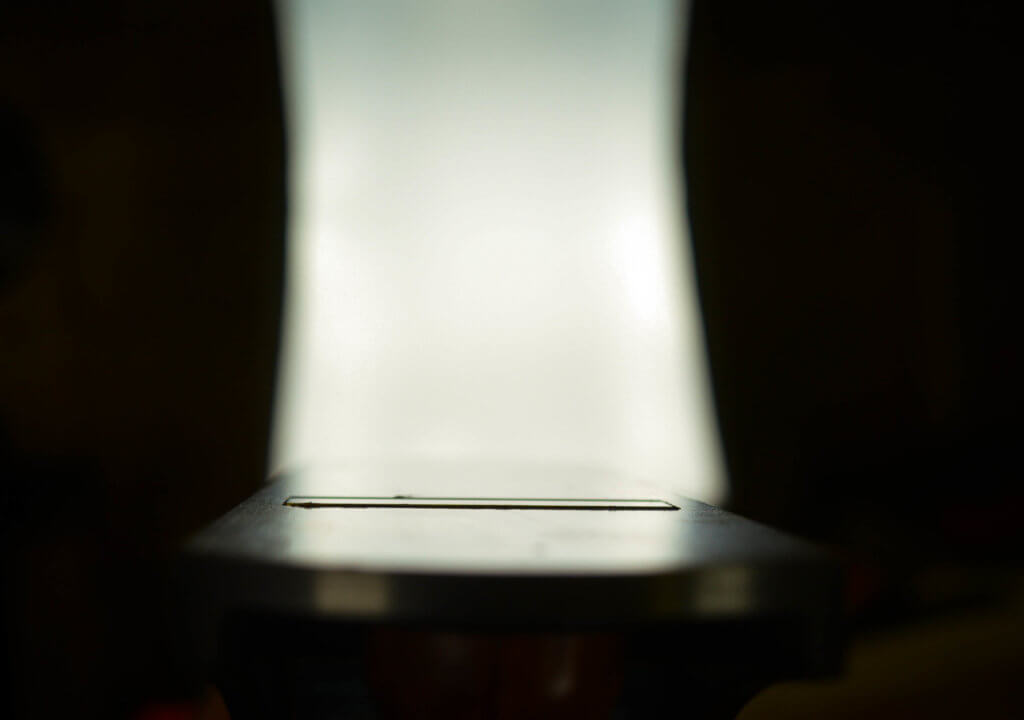
Shooting video in your shop gives you a great backdrop to set the parallel of your blade with.
Another benefit of the Veritas number 4 is a much larger a larger tote than the Stanley design by hanging the handle off the back of the plane body. I can even comfortably fit my XL hands in the tote, it is a good comfortable design The totes are also made out of Bubinga rather than Rosewood making them much harder to crack (rosewood has a hardness of 2800 which also makes it more brittle compared to the 1980 of bubinga. Stanleys have been made with several different woods over the years and even a few made of aluminum.)
Out of the box, this plane takes less than 5 minutes to set up, and the results are immeadiately repeatable and of the highest quality. The only real time that was taken setting this up, unless you want to take the blade back through your own sharpening ritual, is learning the Veritas “controls.” The no. 4 operates by the same principals as the ubiquitous Stanley mechanism but have improved positive feedback and precision. It is possible to get what feels like single cell shavings and a glass smooth finish without easing the corners of the blade at all. So at $232 and $13.95 shipping, and 5 minutes of set up, the total doing work cost would be $247.20.
Finale

The adjustable throat of the Veritas allows for a precision opening of the planes throat.
Comparing costs and results you could come up with a couple of conclusions. A good used Stanley Bailey plane is a great value for a hobbyist but the reliability of sourcing a good plane, and the variable cost makes the value somewhat unpredictable. For a hobbyist getting a useful tool and a project in one fell swoop is great. If you are a furniture maker, a perfectionist, a tradesman, or you just appreciate fine tools and don’t want to do the work to restore them, the Veritas is a marvel of modern engineering meeting classical craftsmanship. If I had to choose one (I wouldn’t, well I didn’t anyway,) take everything into consideration. A classic stanley no. 4 is cheaper and will give you very good results after putting a few hours into it. The Veritas is basically a perfect hand plane, with incredible precision in engineering, and micro adjustments out of the box. The results will speak for themselves, both of these planes get the job done but it is really down to your needs. If you are a tradesman, and downtime is lost revenues and you need a high quality plane with predictable and repeatable results, NOW buy the Veritas. If you are a hobbyist and tight on cash, and you want to get an heirloom tool and a project in one fell swoop, get the Stanley. If you just want the best possible tool, as amazing and ubiquitous as the Stanley is, and it almost pains me to say this, buy the Veritas. It is a marvel of engineering, with old world over manufacturing. All of the materials are well thought out and executed beautifully, and the design is timeless. I hope this helps you take all of the factors into consideration when considering a hand plane.
By Rick
Wood.Work.LIFE

The premier fine woodworking and lifestyle hub.


