

Making Sawdust
and…Eventually a bunk bed

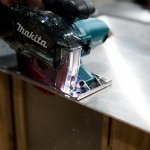
Milling the cutoffs from the 2×12 into square straight stock makes a lot of sawdust and wood chips.
After 2 and a half years in her crib my little girl is growing up and with a new one here it is time for my little girl to get her big girl bed. This is the boring part of her doll house bed. In the next post I will share the SketchUp drawing of the finished project, but this design for a bunk bed frame will be stronger than it needs to be and using construction 2x12s at around 13$ a piece and milling out the straight grained pine myself this is is over a 100$ cheaper than a comparable bed even from IKEA. You could of course use 2x4s or 2x6s if you don’t feel like doing all the milling but the 2x4s will not be as strong and will likely bow over time (I will explain wood behavior in a future post) and 2x6s are strong but cosmetically they are a little bulky..
If you are interested in a design using 2x6s, Jay Bates found here has a great design using pocket holes but I appreciate the extra strength of integral joinery and more long grain glue surface(again more on wood behavior and assembly in future posts.)
Anyway, the whole process starts with milling the 2x12s into usable square and straight stock. Using the table saw or band saw (a band saw here would be highly recommended, straight grained wood holds a lot of stress.) , first trim the outer 3 inches off of a 2×12 (if you plan on squaring and straightening the stock by hand you may way to leave an extra 8th to 1/4 of an inch.) If you properly selected your 2x12s (I suggest getting 2x12s with clear not free straight grain, and as clear as possible core wood.) this would leave you with clear straight 6/4 pine that is strong in every direction, effectively quarter sawn pine. If you have a strong table saw with a riving knife you can rip the 2×12 full length and cut to length afterwards. You will need 6 75.5″ long pieces and 6 42.5″ long pieces for the long and short sides of the frame.
After you mill the edges off you can use the heartwood, although not as stable, for the vertical pieces of the frame. I trimmed 2 1/4″ pieces out of the center of the 2×12 (I don’t use the center of the tree) to make make the vertical supports, I made my frame 72″ tall to alot for a trundle bed under the bottom bunk and some other considerations when putting the final product together for the dollhouse bed. But this dimension can be tweaked for your needs. You will need 8 of these pieces. In total I used 6 2x12x10s to create the frame.

By cutting the outside edge of a 2×12 and leaving the heartwood you are left with strong straight-grain wood.
When you are done with milling, you are left with some good looking straight-grained pine as shown above. The benefits of this type of wood as opposed to a 2×4 is that the growth rings are more consistent so it will expand and contract at the same rate in all directions. You also get the strength of the straight grain on all sides of the board which optimizes the strength of the wood over a distance. Additionally as far as using regular construction pine in furniture, this is typically the best looking way to use the wood. You could use just the best part of the 2x12s for the whole thing which would look better if you are going to just make a bunk bed. Since mine will be covered with plywood in the dollhouse bed, I used the heart wood for the vertical supports to reduce cost and waste since they won’t be seen. beam strength

Once you have all of your stock milled to final dimensions you need to construct the half lap joints, this is the simplest of integral tenons and will require only a dado blade and a miter gauge with and auxiliary fence attached to it. You could also do this easily with a router, or a circular saw, or a radial arm saw, hammer and chisel, whatever makes you happy. You could also build these frames with tenons, or even floating tenons if you had a Festool domino, but I don’t have that kind of time or money and I am going to wrap the whole thing in plywood anyway so half laps it is.
The first step (after marking out all your boards and taking a moment to lay out your workflow) is setting up your dado blade to cut exactly half of each board, I found the easiest way to do this was to get two of the short pieces (42.5″ pieces) and setting the dado to less than half of thickness of your stock, cutting a dado in the end of each workpiece and slowly raising the blade to sneak up on the cut. Once the two pieces interlock (or lap) with the faces flush you have your depth for all of your cuts. Sneaking up on cuts and test fitting rather than precise measurements and tools is the key to good joinery, this how craftspeople for 1000s of years have been producing accurate and precise work.
Each of the stretchers (42.5” and 75.5″ long pieces) need a dado on each end to accommodate the 2 1/4″ vertical pieces (at whatever their final dimensions are after milling.) You should be able to set the fence on your table saw once and just batch out all of these cuts.
The more difficult cuts are on the vertical pieces to accommodate the rails, because you need these dadoes to be absolutely square and it can be a bit unwieldy to cut a dado in a long piece with a tablesaw. If I were to do this again I would have done it with a router and my router jig. I spaced my rails at 10″ from the bottom (to accommodate a trundle, or some storage), flush with the top, and 12″ from the top. In this case I made these with my tablesaw fence. I found it easiest to trim the edges of the dado before hogging out the bulk for clean cuts, but this may vary with the quality of your dado blade.

The half lap joints for the frame are cut and ready for glue up.
Once all the joinery is milled all that is left is the glue up. Find a nice large flat area to lay everything out, get your clamps ready, and liberally apply glue to each joint on all mating surfaces. I used some brads in each joint to keep the joint aligned while I clamped the rest of the frame together but this could be done with glue alone and would still be stronger than it needs to be.

With clamps or screws or any combination of join the half laps and check for square.
Once you get the frames assembled it is as simple as clamping it together and drilling holes for bolts and t-nuts.to assemble the bunk bed frame. After the frame is assembles it is as simple as building so frames and slats and drop your mattress in and you have yourself a bunk bed. I will show how I intend to do this in a future post because I intend to do this, a little more gothically. Stay tuned.
By Rick
Keep your tools sharp, and your mind sharper
Wood.Work.LIFE.

The premier woodworking and lifestyle hub.


